Saturday, February 25, 2012

My Ultimate Mech Bay.

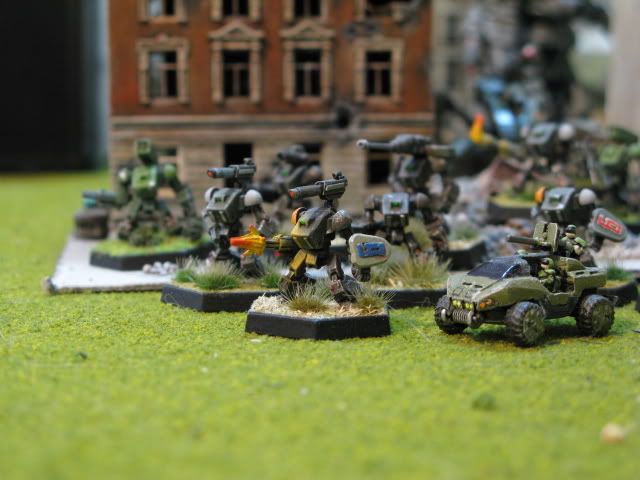
Here is one of my little pet projects that has been on and off my priority list for quite a while. This is the closest to finished it has been so far. I threw in a bunch of eye candy as well. These are four separate mech bays made by Kotobukiya of Japan. I am currently in the process of permanently mounting the four bays onto a plank of wood so that I could move it from place to place a whole lot easier. Why, you might ask, do I need to move them all together? Just wait until you get to the bottom of the page.....

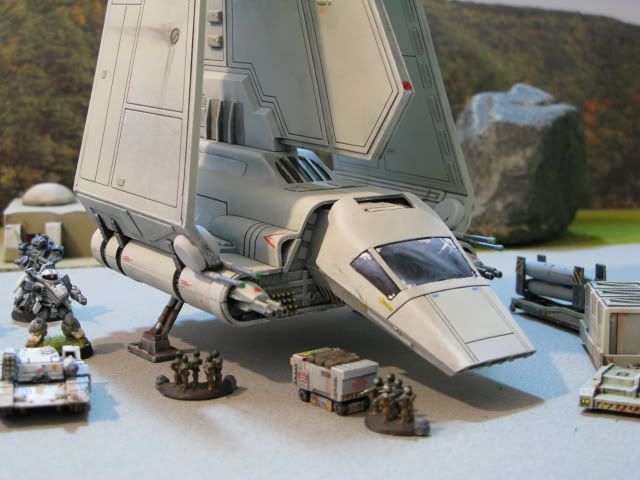
The loading claw in the foreground is fully articulate and it comes with an interchangeable engineer platform.


Here you can see a custom control booth that I scratch-built to monitor the flow of traffic in my mech bay. I also added some guard rails to the walkway on the right, but I see I have forgotten guard rails on the platform where Han Solo is standing dangerously close to the edge. Oops. I hope there are no surprise OSHA inspections...

The coolant turret with the hoses is also a custom-built piece of my mech bay. The hoses are made from two part epoxy. I think the turret itself might have been part of a Transformer toy.


Ok, now you have a pretty good idea of how busy my mech bay is. Now you are probably asking "Why is this the ultimate mech bay?" Well, here comes the shock and awe portion of my post....


To give my control booth a bit of life, I painted some crew silhouettes inside.


Now you know why the bay door is so big.


I still have to work on toning down the LEDs just a little bit, and the white ones look a bit like the blue ones in some pics, but good grief, it was a lot of work to install them. I believe this little project has been well worth the trouble so far.

Wednesday, February 15, 2012

The Cherry Blossom Tank.

My friend, Owen, is starting a 15mm army. He wants his army to have a Japanese-inspired color scheme. He sent me a package full of miniature goodies. In the box was a note saying I can keep everything in the box on one condition: I must paint the tank for him...The note was written on a printout of some pictures of a color scheme he had in mind. With the pictures close by on my desk, I accepted the challenge! What you see here are the results of that challenge: paint a cherry blossom tree on the tank!
    The tank is made by Khurasan Miniatures. It is a 15mm red faction tank with the red eagle turret option. I'm gonna have to get a couple of these for myself now. I added a few extra details: the muzzle brake, the crew shovel on the hull, and the screen covers on the turret.


I threw in a few of my own 10mm minis to give you a sense of scale. This tank would make an excellent Battletech super-heavy...with a few more guns!


Real Men Paint It Pink....

This is a commission for a charity auction winner that I just recently finished. He has a custom mech company called the Barbie Brigade. Their unit colors are...well...a bit unusual for a war machine, but who am I to turn down such a challenge? He gave me the general color scheme- pink with white trim- and I went from there. This mini is a classic 1:300 scale marauder II approx 2in. or 4.5cm tall. He also supplied me with a pin up girl decal and the unit decal. I altered a few details that I didn't like about the original mini. I enlarged the PPC barrels on the arm pods to look like proper heavy weapons. Then I enhanced the hull cannon by replacing the barrel with something more suitable. I also beefed up the turret attachment for the hull cannon. Then finally I replaced the old exhaust vents with my new, improved versions. The old ones looked like flower petals.


New barrels on all the big guns! Scandalous art work on the nose, ohh-la-la!


New vents!

Those are tiny, blue, reflective jewels in the gun barrels on the arm pods.

Monday, February 13, 2012

Still More Star Wars Meets Battletech....

I LOVE STAR WARS!!! You know this by now. I am a fanboy and I am unashamed. Here are a few more Star Wars minis for your viewing pleasure:

I think this was a Star Wars Action Fleet toy. It looked like it was properly scaled, so I bought it. Um...Yeah, it no longer carries droids.

This was also an Action Fleet toy. And, yeah, it no longer carries droids...or jawas for that matter. The crawler's name is Shamblin' Bob. 

I believe this was made by Ertl Models. It did not have any scale listed, but I think it is pretty darn close. the wings are fully articulate, as well. I added some missile pods to the front hull.
This is the business end, you rebel scum!
This version of the AT-ST was commissioned by the Empire shortly after the battle of Endor. It is equipped with all sorts of anti-cute 'n' fuzzy weapons.

Another modified AT-ST. I gave this one A larger chin cannon. His un-modified platoon mate is behind him. Actually, I shouldn't say "un-modified". I added the guard rails on top of the hulls.  


This one is loaded with napalm rockets. Again, another precaution against all things cute and fuzzy.


With the exception of the first three, all of these are official 1:144 scale minis made by F-Toys of Japan. I just added my own special touch....


Fire For Effects!

As I was browsing through all the wonders of the vendor booths at Gen Con '08- my first Gen Con- I wandered into the Armorcast yard and found some things that instantly sparked a brush fire of imagination. Here were these fire effects: missiles with exhaust trails, explosive cannon rounds, laser blooms, oh my! I greedily grabbed an assortment of effects that I HAD to have, and for a few seconds actually wished I was back home at my studio desk....That soon passed when I discovered the Dream Pod 9 booth, and so on, and so on. Once I did get back home, I immediately began using the wonderful bits that i bought. Then I began to have other visions of even grander special effects. I shall call this the George Lucas Syndrome- only without the shitty child actors, story-killing editing, and "WTF" CGI characters! Here are some pictures of my special effects:


This laser bolt was created with the broken end of a plastic paint brush handle. i just melted the one end and shaped it to fit the gun barrel.


Ok, he's not exactly firing, but his flame thrower is ready to light up a few cigars! I sculpted the flame out of 2-part epoxy.

This is actually a classic Battletech scaled mini ( 1:300 ). The missiles were made out of 1:35 scale bayonets. The missiles were then attached to wires which in turn were anchored into the launcher. Carefully using a can of spray foam, I applied the exhaust plume and missile trails.

This is meant to look like a particle projection or plasma blast. I got this idea from the X-Box Mech Assault game. However, I wanted to change up the color a bit. I used two short strands of anti-static wire and carefully built up some spray foam on the strands.


This was my first experiment with the anti-static wire and spray foam. I think this might also have been my first attempt at painting light source effects.

This is what happens when you decide to clear out the building with four heavy flamethrowers! the huge fire ball is not fixed to the mech. I made it as a kind of blast template by fixing a big wad of spray foam to a wooden base with a nail stuck in it for the flame stream. The range may be a bit too short, but it sure looks wicked cool!


Well, I hope nobody tried to look at this thread with a dial-up connection! I didn't realize just how many fire effects i had.