Saturday, January 5, 2013

The Show Isn't Over Yet....

Alright, here we go with a whole lot of new air power. Let's start with a light aerospace fighter that I sculpted. Sometimes I look through all my old lead and pewter minis for some inspiration. I found that inspiration in an old fighter from the classic Interceptor game by FASA. Of course, the original mini is too small for my preferred scale, so I dug into the Super Sculpey and began to make one in the proper size....


Isn't she cute?

The entire body is sculpted from Super Sculpey with the exception of some small details like the gun barrels and afterburner nozzles.


I put her next to an F-Toys 1:144 Harrier to show just how small she is. I do not recall what the fighter's name was in the Interceptor game, but I do know it was a light fighter.


In keeping with the spirit of air superiority, here's a whole squadron of some familiar flyers. These are Hot Wheels toys that I determined were as pretty damn close to 10mm as I thought possible. I was turned on to these when a friend of mine posted a pic of a Batman flyer ornament he had in his Christmas tree. I mentioned that I might need one or two, but he kindly informed me the ornament was quite large and I should look to the Matchbox or Hot Wheels toys for something a bit more my size. Here's a helpful bit of info for all you 15mm gamers- the Matchbox bat flyer is right up your alley! I saw them at my local Target store. I had to get the Hot Wheels off of E-Bay where I found a guy selling SIX of them! CHA-CHING!!


New paint jobs and A few upgrades! I decided to paint 3 in a standard military green, 2 in an urban grey, and one with desert wasteland camo.
The one on the left is stock. The one on the right has a pair of larger caliber cannons.
Say cheesecake!

Why not rocket pods? I sculpted a pair for this one.


Here is the belly. I had to grind off the manufacturer's raised letters and added some ammo drums for the larger cannons.

Wasteland camo with the standard load-out.


Are we having fun yet? Show's still not quite over, folks. Hope none of you are on dial-up....
Here is an old project that sat in the "to do" box for a loooong time before I remembered it was in there. When my TIE fighter forces began to grow, I knew this was destined to be a part of it. I'm not sure what it is, but it is from the Star Wars Titanium series of collectables.


Here she is with a squad of TIE-Ds. I'm going to call it the TIE Broadsword- A very heavy assault version for the TIE family.

I sculpted a little launcher pod for the hull surface and the ventral cannon is a spare part from a Wizkids Mechwarrior mini.
I added the engine panel on the top of the hull and the three engine nozzles.
Ventral view showing where I also added some VTOL nozzles.


Still not done.....
Next up are a pair of super-rare Anigrand Chiss Clawcraft. These were included in the 1:144 Anigrand Lambda Imperial shuttle, of which I have one. My friend ( who traded me some wonderful and rare Anigrand models in exchange for my painting services ) gave me the clawcraft out of his kit because he didn't want it. Who was I to say no?


While they have the familiar TIE body, the wings are quite alien and elegant. I wanted to give them a more artistic flare to better represent their alien origin. I put some alien markings on them  and even added a bit of alien nose art to the one on the left. Don't ask me why I have GW necron decals...I haven't the slightest idea how they ended up in my decal box.


Some small patches of color to set them apart.

Those barrels on the arch of the wings are not guns, but maneuvering thrusters!


 Finally we draw to the conclusion of the air power post.....
When I went to Target to find the Bat Flyer, I did not succeed. However, I did discover a few other excellent things to make my trip worthwhile. These are from the Matchbox line of Sky Buster aircraft. Excellent finds for my scale requirements!


A heavy lift Helicopter!
I added a few extra details like the hydraulic hoses.


I added the cargo clamps, too. I sculpted the clamps and the clamp housing.

I also added the hazard lights to the belly and the hatches on the nose.

A pair of super-cool fighter jets!

I decided to go with a dark paint scheme for a night fighter.


Since there were no guns or missiles on her to begin with, I had to sculpt my own. I figured a pair of massive gatling cannons in a pod on the belly would do the trick. I also added a pair of VTOL nozzles and an ECM dome under the nose.

The second bird I just went with a wild sky theme.

Hello Nurse...

This one has the same modular pod on the belly, but it is sporting a pair of heavy particle cannons instead.


That finally concludes the Spaceman Spiff air show. I do hope you enjoyed it! Stay turned for the ground forces....


A New Year...Time To Break Out The Big Guns!

Well, here we go with a new year! Hope everyone made it to the new year without having to post bail. I guess I'll start this year out with something rather big...A 1:200 scale MAC II Monster. I can't begin to tell you how long I have tried to find one of these for under $100. Then suddenly not one, but TWO fell into my clutches by way of some fancy trade work! When it rains, it pours! Unfortunately both of them sat for a while in my "to do" box while I ended up working unreasonable amounts of overtime at my real job. Well, I squeaked in some hobby time here and there and, as you will soon see, I amassed quite a number of finished pieces. Shall we get on with the show?


The name says it all.....The cheesecake is a decal, but I painted her name. I can rarely leave a model or a mini in stock condition, which is evident in the chin cannon. I sculpted the housing and attached a gun from some Heavy Gear spare parts.

Here she is with a few supporting units. I mainly wanted additional minis in the picture to show off her immense size!

I also added some dirt to her feet. Don't expect her to wipe them off before entering your city.

6 Mech kills and , yes, a dropship!

Rear view.

Rear view with "pants down".

I painted a few details in the engine bay with florescent paint. When I light it up with a UV light, they glow!


I didn't want the arms to be missile launchers so I applied some plastic gem stones to make the barrels look like she's warming up the heavy particle cannons!

A shot of the chin turret and the cockpit...or where I think the cockpit should be.


Well, she was worth the wait! The second one is going to be extensively modified....imagine enormous gattling cannons instead of city busters.

Saturday, December 8, 2012

What Does Spiff Use?

I thought this would be a good idea to show you all what I am using to achieve my results. These are not paid advertisements, just simple product endorsements. I'm not telling anybody they have to use these products. I'm just showing you what MY favorites are and if you are just starting out or trying to hone your skills, I hope this might be useful.


I just recently discovered the line of Vallejo paints a couple of years ago. I am absolutely, 100% in love with these paints! A couple of the colors have some consistency issues- yellow and orange, to be exact- but for the most part these are the most painter-friendly acrylics I have ever used.

If Vallejo makes such fantastic paints, then the inks must be good, right? Correct! The inks are very vibrant and I only thin them with water to tone down the coverage. I use the inks primarily as a stain for exhaust vents, tank treads, leg & arm joints, etc. Occasionally I use the inks for my cockpit jeweling effects. The washes, or shades as they are called, are a thinner version of the ink. They immediately flow into the recesses of the surface and hardly affect the surface color. I use these a lot for redefining panel lines and weathering. I use the shades straight outta the bottle- no thinning or strange home combinations are required.

These Secret Weapon washes are very similar to the Vallejo shades, only they come in a wider assortment of colors. They have a slight stain effect, which is useful for when I want something just a few shades off of the base color. Excellent consistency and flow- no thinning required.

I take great pride in the fact that people always ask if that is a decal or did I paint it. Well, this is how I do it. I paint a bit of the medium on the surface where the decal will go. After carefully sliding the decal in place, I use a tiny sponge applicator to press the decal down into the medium and push out the air bubbles. After that dries, I paint on a coat of the matt varnish over the area of the decal. Of course, after the entire mini is done, I give it a shot of Krylon matte spray sealant.

As cheap as these paints are, they are actually good and useful. The white is what I use to lightly highlight all the raised surfaces with. The other colors are good for a rough base coat and painting scenery. They don't cover nearly as well as the Vallejos do, but since they are cheap, it is an acceptable trade-off.

Liquitex ix primarily a canvas-type artist acrylic, but it has some uses on my minis, mostly small detailing uses. These colors are not consistent enough for painting large areas.

FW and Liquitex make some excellent inks, but again, these were not designed with miniature painting in mind. I frequently have to thin them with water to get them to flow a bit better. The red oxide you see in the picture is the ink I use for my rusty effects. The sepia ink I use for tank treads and tires. The other colors I have are used whenever I feel that is the right ink to use....I can't really explain how I know. It is a feeling, like a ripple in the Force.

Well, put them all together and you get a cluttered desktop. A cluttered desk is a sign of genius...right?

Aerospace Superiority

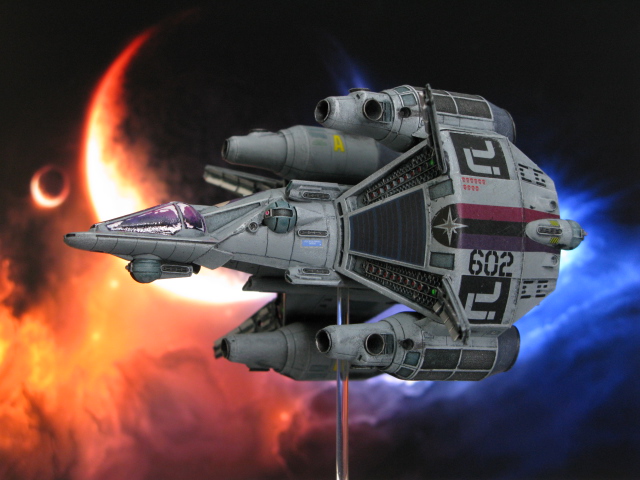
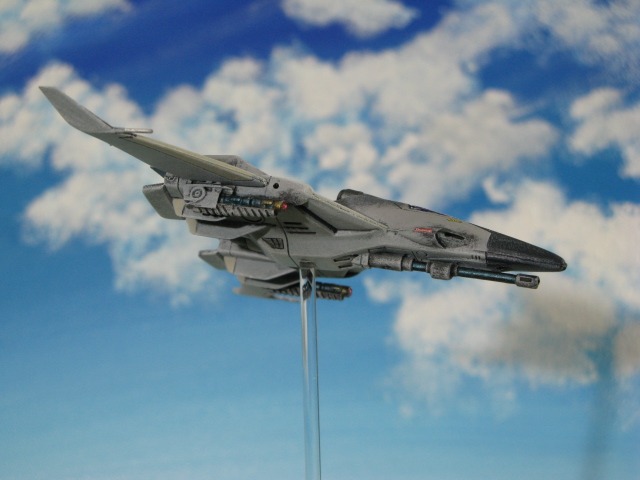
Some of you may be familiar with my postings on the Battletech forums and already know about the massive amount of air power in my collection. Well, since my blog is fairly new, I will just stick to my newest stuff rather than go back through all the old pictures.
    I have an enormous fetish for assimilating other sci fi genres into my Battletech collection- my Star Wars posts are certainly overwhelming evidence of that! Well, here are a few more fighters from other sources that I have assimilated.....resistance is futile!


If you don't recognize this starfighter, then you are not a true sci fi fan. This is the awesome Gunstar from "The Last Starfighter". A beautiful 1:144 scale resin kit from Fantastic Plastic.


The death blossom covers are fixed open. No way I would fix them closed!

I decided to customize mine a bit by adding some nose art.


Here is a shot just to show the size comparisons.

This is a starfighter from a really old anime series called "Crusher Joe".

I immediately determined there were not enough guns on the stock version, so I went about upgrading the three models I had.

I actually added the rectangular burner nozzles. The stock mini had nothing there but a plain old pair of holes!

Large pulse lasers under the wings and a large autocannon in the nose ought to do the trick!

Fighter #2 has a load out designed for close contact dog fighting.

I sculpted a housing for the gattling gun in the nose and added sets of medium lasers under the wings.

Fighter #3 is set up for low level ground attack. I went with an interesting camo pattern for this one.


I had to sculpt the rocket pods and the pylons for them, but I left the nose mounted weapons in the stock configuration.

Nose art and a few kills!

The business end!